What is Purging?
Purging refers to the removal of air/gas from a closed system, such as lab equipment by using pressure, purging gas or a vacuum. An air purging component eliminates air/bubbles from the equipment, which not only reduces the risk of contamination but also prevents loss of the liquid reagent. For this purpose, manufacturers generally install a recirculation valve that prevents reagent loss during this process, by re-directing the liquid into the bottle.
How to Perform Purging in a Burette?
In order to eliminate the risk of contamination and erroneous calculation during titration, it is advised to purge the burette properly. If the burette is not purged appropriately, there would be a need for another titration procedure, resulting in the wastage of reagents. One can easily ensure the reliability of an experiment by purging the burette in the right way. One can either manually purge the instrument or use an automated purging component.
We have listed a few steps for the Glass Burette, which should be followed if one wants to purge manually:
- Fill the burette with distilled water (approximately 5 milliliters). It is important to use distilled water as it makes the experiment free of contamination and impurities. One should fill the burette from the top and trickle the water on the side to remove any suspended particles.
- Ensure that the stopcock is in the closed (horizontal) position before filling the burette.
- Next step is to tilt the burette in a manner that the water comes in maximum contact with the burette wall without getting spilled out from the top. Then, rotate the burette in a way that the distilled water is able to rinse the burette completely. In case, you see water droplets accumulating on the burette’s sidewall, you ought to clean the burette more carefully with a suitable glassware detergent.
- After this, pour the excess liquid out from the burette’s top. Switch the position of the burette to vertical and open the stopcock valve by rotating it. You must ensure that you do this step while holding the burette over a sink as it will drain out the liquid from the bottom. Turn the stopcock to the close position and repeat the entire rinse process twice.
- After this, rinse the burette using the titrant solution. This is done to ensure that the solution concentration is accurate. It is important to rinse the equipment with a titrant as all the distilled water needs to be removed from the burette, as it can lead to dilution of the titrant solution if left inside the burette.
A burette can also have automatic purging features to ensure the removal of air bubbles from the barrel, which is generally the case for digital burettes. Firstly, you need to prime the instrument by gently pulling the piston up and pushing it down till it comes in contact with its base. This process is repeated 4 to 5 times.
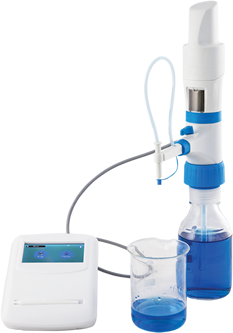
MICROLIT E-BURETTE is designed for dispensing liquids directly from the reservoir bottle without any risk of splashing and contamination. Prior to using a Microlit E-burette, there are some usual steps that need to be followed for a bubble-free dispensing process:
- There is a purging mode on the control panel home screen. Click the option to activate the purging mode.
- After selecting the mode, the user is usually asked to turn the knob to enable recirculation mode.
- After turning the knob to the recirculation mode, the user confirms the action and gives a go-ahead for purging to occur by clicking on the control panel screen.
- This results in an automatic purging action to take place within the digital burette. In case, you suspect that the equipment has not been purged properly, you can repeat the entire process again until there is no air bubble left inside.
How to Perform Purging in a Bottle Top Dispenser?
Purging in a bottle top dispenser is performed in a similar way. Although some dispensers are equipped with specialized air-purging and closed-circuit systems, which are built to prevent any loss of reagent while dispensing, as well as while the device is not being operated. In order to air-purge the instrument perfectly, and ensure minimum reagent loss, one needs to turn the discharge tube at 90°. The trapped air inside the equipment is purged/removed through pumping in the closed circuit. This makes the reagent move back into the mounted bottle. After you have pumped the instrument 2 to 3 times, it becomes free of trapped air bubbles. Pumping the air out not only helps to avoid contamination but also prevents wrong measurements.
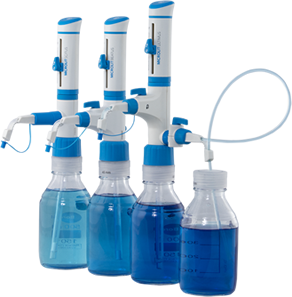
Microlit Bottle top dispenser (BEATUS) comes with a dual-mode re-circulation valve to prime the instrument without the loss of reagent. To operate the Microlit Bottle Top Dispenser, one needs to follow the below-listed steps:
- You need to rotate the recirculation knob 90 degrees anti-clockwise for switching it on.
- The, you ought to aspirate and dispense 1 to 2 times, till there is no air bubble left in the barrel.
- The, turn the recirculation knob off by moving it in a clockwise manner towards the dispensing nozzle.
- Finally, you will be able to aspirate and dispense without any air bubble formation.
Reach out to us at info-usa@microlit.com if you wish to know more about Microlit E-Burette, Bottle Top Dispenser or any of our products and make a purchase.


 5421
5421